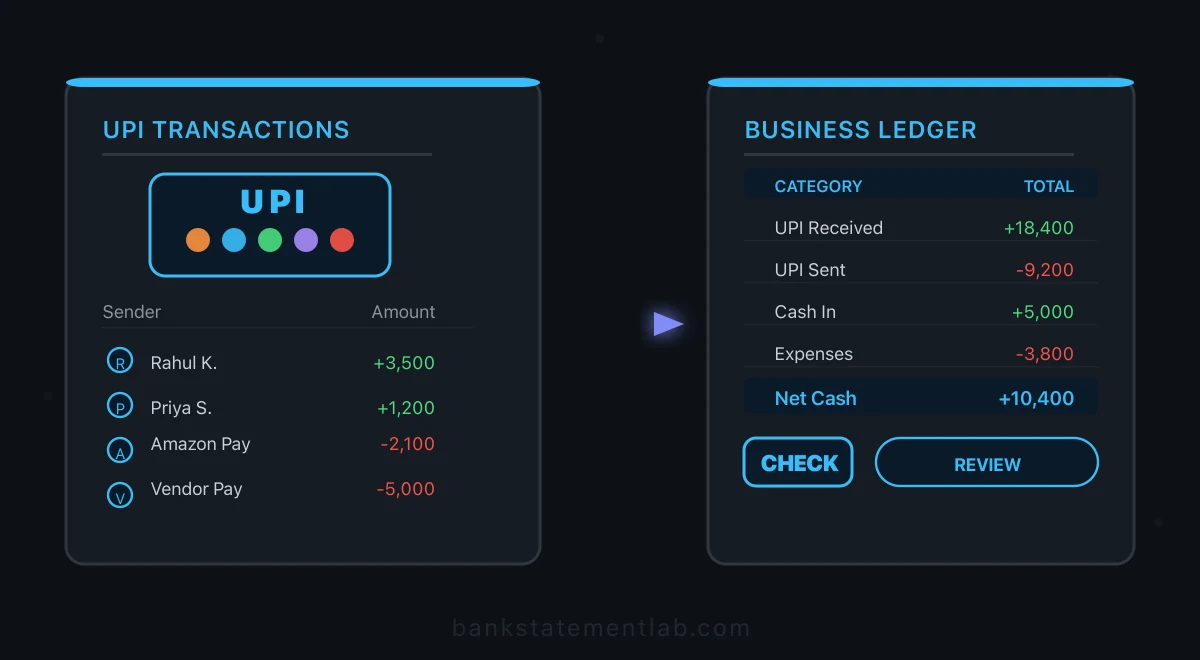
हर सप्ताह घंटे बचाएं
अपने बैंक स्टेटमेंट (PDF) को Excel, CSV या OFX में बदलें, बिना डेटा दोबारा हाथ से दर्ज किए।
UPI ने छोटे कारोबार में payment collection आसान किया है, लेकिन bank statement अकेले sales register नहीं है। उसमें customer receipts के साथ own-account transfers, loans, failed-payment reversals और non-business entries भी हो सकती हैं। यह guide बताती है कि statement से UPI rows कैसे निकालें, reference से invoice/ledger मिलाएँ और unmatched items की review list बनाएँ।

UPI पेमेंट्स का हिसाब क्यों ज़रूरी है
बहुत से छोटे बिजनेस ओनर सोचते हैं कि “पैसा बैंक अकाउंट में आ रहा है, तो हिसाब की क्या ज़रूरत?” लेकिन यह सोच आगे चलकर बहुत बड़ी मुसीबत खड़ी कर सकती है। यहां समझिए कि UPI ट्रांजैक्शन का हिसाब रखना क्यों ज़रूरी है:
GST Compliance
GST registration, composition eligibility और tax rate state, supply type, activity और special rules पर निर्भर करते हैं। किसी एक ₹40 लाख/₹20 लाख threshold या 1% rate को हर business पर लागू न मानें। Current position GST portal/CBIC पर जाँचें और accountant से अपनी facts verify कराएँ। Bank statement payment evidence है; invoice, bill of supply, credit/debit note और books अलग records हैं।
Profit और Loss ट्रैकिंग
जब तक आपको पता नहीं कि कितना पैसा आया और कितना गया, तब तक आप अपने बिजनेस का सही मुनाफ़ा नहीं जान सकते। UPI से रोज़ाना छोटे-छोटे पेमेंट आते हैं और बिना ट्रैकिंग के ये सब एक-दूसरे में मिल जाते हैं।
बैंक लोन और क्रेडिट
Business loan में lender statements और tax/financial records माँग सकता है। Reconciled UPI ledger income और cash flow समझाने में मदद करता है, लेकिन approval, rate या required period की guarantee नहीं देता।
Customer dispute और reversal
कभी-कभी कस्टमर कहता है कि उसने पेमेंट कर दिया लेकिन आपको नहीं मिला। ऐसे में अगर आपके पास सारे UPI ट्रांजैक्शन का रिकॉर्ड है, तो आप तुरंत verify कर सकते हैं।
यहां एक टेबल में देखिए कि हिसाब रखने और न रखने में क्या फ़र्क़ पड़ता है:
| स्थिति | हिसाब रखने पर | हिसाब न रखने पर |
|---|---|---|
| GST Filing | payment rows invoices से reconcile होते हैं | turnover या tax period गलत हो सकता है |
| Profit Analysis | receipts और payments की working list मिलती है | transfers को income/expense समझने का risk |
| Bank Loan | cash-flow evidence समझाना आसान | incomplete records से clarification बढ़ सकती है |
| Customer Dispute | reference और status खोजने में मदद | matching में अधिक समय लग सकता है |
| Tax Review | source documents तक audit trail बनता है | missing links और exceptions ढूँढनी पड़ती हैं |
| Business Growth | Data-driven decisions लिए जा सकते हैं | अंधेरे में तीर चलाना |
बैंक स्टेटमेंट में UPI ट्रांजैक्शन कैसे दिखते हैं
अपने बिजनेस में UPI ट्रांजैक्शन का हिसाब रखने के लिए सबसे पहले यह समझना ज़रूरी है कि ये ट्रांजैक्शन आपकी बैंक स्टेटमेंट में कैसे दिखते हैं। हर बैंक का format थोड़ा अलग होता है, लेकिन कुछ common patterns हैं।
नीचे narration काल्पनिक उदाहरण हैं, सभी banks के लिए parsing नियम नहीं। UPI RET या credit adjustment देखकर उसे sale न मानें; original reference और bank status से reversal की पुष्टि करें। NPCI की UPI FAQ merchants को status और शिकायत के लिए acquiring bank से संपर्क करने का मार्ग बताती है।
Credit (पैसा आने पर) का Format
जब कोई कस्टमर आपको UPI से पेमेंट करता है, तो आपकी बैंक स्टेटमेंट में कुछ इस तरह entry दिखती है:
UPI/CR/412345678901/RAJESH KUMAR/SBIN/rajesh@oksbi
UPI-CREDIT/9876543210/PHONEPE/merchant
BY TRANSFER-UPI/CR/REF123456/GPAY
Debit (पैसा जाने पर) का Format
जब आप किसी supplier या vendor को UPI से पेमेंट करते हैं:
UPI/DR/412345678902/SHARMA TRADERS/HDFC/sharma@paytm
TO TRANSFER-UPI/DR/REF789012/PHONEPE
UPI/P2M/SUPPLIER NAME/upi@ybl
समझने की बातें
- CR = Credit (पैसा आया)
- DR = Debit (पैसा गया)
- Ref No. / RRN = transaction reference; statement में दिखने वाला format bank के अनुसार बदल सकता है
- UPI ID का handle routing/PSP से जुड़ा हो सकता है, लेकिन उससे payer ने कौन-सा app इस्तेमाल किया यह हमेशा निश्चित नहीं होता
- P2M = Person to Merchant (कस्टमर से दुकानदार को)
- P2P = Person to Person (व्यक्ति से व्यक्ति को)
मुश्किल यह है कि बैंक स्टेटमेंट में कस्टमर का पूरा नाम नहीं दिखता, या description इतना छोटा होता है कि समझ नहीं आता कि यह पेमेंट किस चीज़ के लिए था। यही कारण है कि सिर्फ बैंक स्टेटमेंट देखकर हिसाब रखना आसान नहीं है।
मैन्युअल तरीके से UPI ट्रांजैक्शन ट्रैक करना
बहुत से छोटे दुकानदार और बिजनेस ओनर अभी भी पुराने तरीकों से UPI का हिसाब रखते हैं। आइए देखते हैं कि ये तरीके कैसे काम करते हैं और इनकी क्या limitations हैं।
तरीका 1: बही-खाता (Register Book)
सबसे पुराना और सबसे common तरीका। हर UPI पेमेंट आने पर नोटबुक में लिख लो — तारीख, amount, कस्टमर का नाम।
फ़ायदे:
- कोई technology की ज़रूरत नहीं
- तुरंत लिख सकते हैं
- हर कोई कर सकता है
नुकसान:
- volume बढ़ने पर हर entry समय पर लिखना कठिन
- भूल जाना common है, खासकर busy hours में
- Calculation errors होते हैं
- GST filing के लिए data organize करना बहुत मुश्किल
- बही-खाता गुम या खराब हो सकता है
तरीका 2: Excel या Google Sheets
थोड़े tech-savvy बिजनेस ओनर Excel या Google Sheets में ट्रांजैक्शन entry करते हैं।
फ़ायदे:
- Auto-calculation हो जाता है (SUM, AVERAGE)
- Filter और sort कर सकते हैं
- shared access और formulas आसान; security settings अलग से configure करनी होती हैं
नुकसान:
- हर ट्रांजैक्शन manually type करना पड़ता है
- बैंक स्टेटमेंट से Excel में data copy करना time-consuming
- Category manually assign करनी पड़ती है
- Errors आने के chances ज़्यादा
- समय volume, description और matching complexity पर निर्भर करता है
तरीका 3: फ़ोन ऐप से Screenshot
कुछ लोग हर UPI नोटिफिकेशन का screenshot लेते हैं या PhonePe/Google Pay की transaction history देखते हैं।
फ़ायदे:
- app status और reference देखने में सहायक हो सकता है
- Amount और UPI ID दिखता है
नुकसान:
- Hundreds of screenshots manage करना impossible
- Data searchable नहीं होता
- Reports नहीं बन सकतीं
- structured ledger और invoices के बिना tax reporting के लिए पर्याप्त नहीं
Volume बढ़ने पर manual process को transaction reference, invoice number और review status वाले structured ledger की जरूरत पड़ती है। Automation data entry घटा सकती है, लेकिन invoice matching और tax treatment की human review बनी रहती है।
बैंक स्टेटमेंट PDF से UPI rows निकालनी हैं? BankStatementLab statement को XLSX, CSV या JSON में बदलता है। UPI rows filter करें, original से totals verify करें और उन्हें अपने invoice/ledger से match करें। अभी आज़माएं →
ऑटोमैटिक UPI ट्रैकिंग कैसे काम करती है
एक practical workflow extraction, verification, matching और exception review को अलग रखता है। BankStatementLab PDF extraction के साथ बैंक मिलान रिपोर्ट भी देता है: processed statements को accounting export से compare करें, matching proposals जाँचें और स्वीकार करें। Accounting entries और GST decisions आपके records में रहते हैं।
Step 1: बैंक स्टेटमेंट PDF डाउनलोड करें
Net banking या mobile app से required period का original statement डाउनलोड करें। Availability और custom range bank के अनुसार बदलते हैं; पुराना period न मिले तो bank से पूछें। Password-protected PDF को upload करने से पहले अपने device पर unlock करें।
Step 2: PDF अपलोड करें
BankStatementLab PDF से पहचानी गई transaction rows निकालता है। Result में row count, date range, opening/closing balance और credit/debit totals original से मिलाएँ; unusual layout या scan में correction जरूरी हो सकती है।
Step 3: UPI rows filter और match करें
Description में UPI marker, debit/credit और reference के आधार पर rows filter करें। फिर हर row को invoice, bill, order या own-account transfer से match करें। Pro और Business plans में 17 fixed categories मिलती हैं, लेकिन वे GST rate, HSN/SAC, customer invoice या supplier ledger तय नहीं करतीं। Unmatched और ambiguous rows अलग queue में रखें।
Step 4: बैंक मिलान रिपोर्ट बनाएँ और export करें
BankStatementLab में बैंक मिलान खोलें, अपना accounting XLSX या UTF-8 CSV अपलोड करें और processed bank statements चुनें। तारीख, amount का sign और INR currency जाँचें। समान राशि की proposals को individually या समीक्षा के बाद confirmation देकर एक साथ validate करें; unmatched entries अलग रहती हैं। रिपोर्ट Excel, CSV और PDF में मिलती है। मिलान पर अतिरिक्त credits नहीं लगते; PDF extraction के सामान्य credits लगते हैं। अपनी UPI मिलान रिपोर्ट बनाएँ →
सारा data organized होने के बाद आप:
- XLSX, CSV या JSON export में statement fields रखें
- अपनी sheet में invoice number, party, supply type, tax period और review status जोड़ें
- unmatched entries accountant को clarification के साथ भेजें
- internal transfers, reversals और duplicate imports को sales total से अलग रखें
Manual vs. Automatic — तुलना
| Feature | Manual (बही-खाता/Excel) | Automatic (BankStatementLab) |
|---|---|---|
| समय | volume के साथ बढ़ता है | transcription घटती है; review बाकी रहती है |
| Accuracy | typing और omission risk | extraction errors संभव; totals verify करें |
| Categories | business-specific rules | Pro/Business में 17 fixed suggestions |
| GST work | invoice-ledger matching जरूरी | वही matching और tax review जरूरी |
| Cost | staff time और controls | page credits और review time |
| Scalability | process design पर निर्भर | file/page limits और workflow पर निर्भर |
| Data Safety | access और backup controls | retention और access settings समझें |
GST के लिए UPI ट्रांजैक्शन रिपोर्ट कैसे बनाएं
UPI report GST return का source नहीं, reconciliation schedule है। Return type और frequency registration, scheme, turnover और current notifications पर निर्भर हैं। GST portal guidance से applicable forms और current dashboard due dates जाँचें।
GST rate payment mode से तय नहीं होती
UPI credit की tax rate narration या amount से तय नहीं की जा सकती। Rate और exemption goods/services की classification, HSN/SAC, conditions और current notification पर निर्भर हैं। Current CBIC GST rate finder देखें; पुराने generic slab tables पर filing न करें।
GST Report बनाने का Process
- UPI credits और debits filter करें, लेकिन credit को अपने-आप sale न मानें। Own transfers, loans, capital introduced और reversals अलग करें।
- हर receipt को invoice/order से match करें और unmatched item review queue में रखें।
- Invoice date, place/type of supply और tax period accounting records से लें, payment date से अपने-आप नहीं।
- Purchase payment को अपने-आप ITC न मानें। CGST Act section 16 में tax document, receipt of supply और अन्य conditions हैं।
- Sales register और books से return totals बनाएँ, फिर bank/UPI settlement total से reconcile करें और difference explain करें।
BankStatementLab statement rows को accounting export से compare करके एक-से-एक matching proposals देता है। यह कई invoices जोड़कर एक settlement नहीं बनाता और HSN/SAC, ITC eligibility या GST return तय नहीं करता। Excel, CSV या PDF में मिलान रिपोर्ट accountant को दें; invoice और tax records साथ रखें।
Records और retention
CGST Act section 35 true and correct accounts और supporting records की मांग करता है; section 36 सामान्य retention period बताता है और proceedings में अवधि बढ़ सकती है। Invoices, bills, credit/debit notes, UPI reference, bank statement और ledger link साथ रखें। Due dates, eligibility और retention अपने registration तथा current law के अनुसार professional से verify करें।
5 गलतियां जो छोटे बिजनेस में UPI हिसाब में होती हैं
ये पाँच process errors reconciliation और tax totals बिगाड़ सकते हैं:
गलती 1: Personal और Business UPI मिला देना
एक ही account में personal और business entries होने पर classification कठिन होती है, पर असंभव नहीं। हर mixed entry को owner drawing/capital या business transaction के रूप में evidence के साथ mark करें।
Solution: जहाँ practical और applicable हो, dedicated business account/merchant UPI रखें। Account type और bank terms जाँचें; केवल label बदलने से accounting complete नहीं होती।
गलती 2: छोटे Transactions ignore करना
छोटी entries भी aggregate होकर material हो सकती हैं। लेकिन हर credit sale नहीं है और हर debit expense नहीं; amount के बजाय transaction nature से classify करें।
Solution: हर transaction record करें, चाहे कितना भी छोटा हो। Automated tools से यह बहुत आसान है।
गलती 3: Month-end पर सब एक साथ करना
पूरे महीने कुछ नहीं लिखा, और महीने के आखिर में सब एक साथ बैठकर करने की कोशिश। तब तक आधे transactions भूल चुके होते हैं, बैंक स्टेटमेंट में description समझ नहीं आता, और errors होते हैं।
Solution: volume और risk के अनुसार daily, weekly या monthly cadence तय करें। हर cycle में unmatched items और old exceptions close करें; कोई fixed पाँच-मिनट processing promise न मानें।
गलती 4: Reversals और failed transactions को sale मानना
Failed UPI attempt, reversal या customer adjustment statement में paired debit/credit के रूप में दिख सकता है। केवल credits जोड़ने पर receipts बढ़ सकती हैं, पर taxable turnover का adjustment invoice और applicable GST rules से तय होगा।
Solution: reference, original transaction और accounting document जोड़कर status mark करें। Net bank movement को अपने-आप net taxable turnover न मानें।
गलती 5: Backup नहीं रखना
बही-खाता फट गया, Excel file corrupt हो गई, फ़ोन खराब हो गया — और सारा data गया। बिना backup के आप बहुत बड़ी मुसीबत में पड़ सकते हैं, खासकर अगर GST audit हो।
Solution: encrypted, access-controlled backups रखें और restore test करें। BankStatementLab में source files और results की retention processing route तथा account settings पर निर्भर है। सफल PDF भी कुछ समय रखी जा सकती है; हर file की तत्काल deletion की गारंटी नहीं है। Current privacy policy और deletion settings जाँचें तथा original की सुरक्षित copy स्वयं रखें।
अपने बिजनेस की UPI ट्रैकिंग आज से शुरू करें
UPI reconciliation का लक्ष्य bank rows को sales, purchases, own transfers, reversals और unmatched exceptions से जोड़ना है। Bank statement useful evidence है, लेकिन invoice register, books और tax classification की जगह नहीं लेता।
Manual या automated तरीका transaction count के बजाय control quality से चुनें। BankStatementLab से आप:
- supported bank statement PDF upload करके detected rows निकाल सकते हैं
- XLSX, CSV या JSON export कर सकते हैं
- Pro और Business में 17-category suggestions ले सकते हैं और उन्हें source records से review कर सकते हैं
- original से totals verify करके invoice-matching sheet बना सकते हैं
UPI ने छोटे बिजनेस के लिए पेमेंट लेना आसान कर दिया है। अब उस पेमेंट का हिसाब रखना भी आसान बनाइए।
UPI reconciliation की working sheet शुरू करें। PDF statement को XLSX, CSV या JSON में बदलें, detected UPI rows verify करें और invoice/ledger matching पूरा करें। BankStatementLab tax return या GST-ready report तैयार नहीं करता। अभी शुरू करें →
हर सप्ताह घंटे बचाएं
अपने बैंक स्टेटमेंट (PDF) को Excel, CSV या OFX में बदलें, बिना डेटा दोबारा हाथ से दर्ज किए।